With the new version you can now annotate student work on Moodle using the Advanced PDF editor and, if you want, download the annotated files for archiving purposes. This works on its own or in conjunction with the Feedback Comments feature and/or Moodle rubrics.
Note: this is an advanced feature. If this is the first time you are using Moodle for student assignments, please read the Assignments tutorial first.
Setting up the Assignment
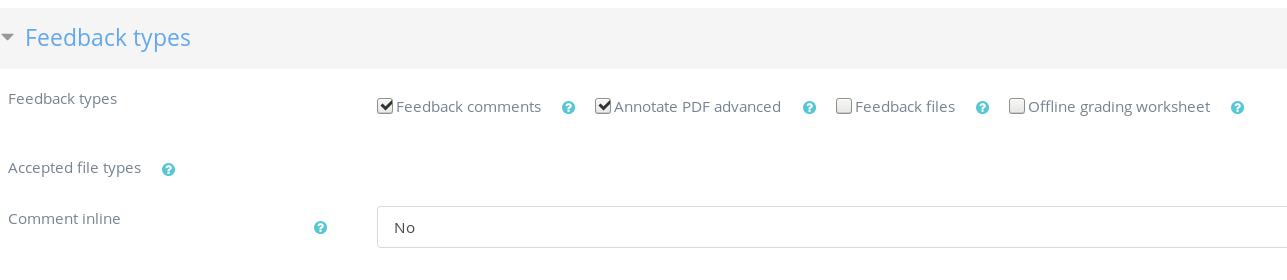
Under Feedback Types, check the Annotate PDF advanced box (and the Feedback comments box if you want).
Annotating the PDF
From the assignment screen, click View All Submissions then Grade for the student whose work you want to see, just as normal.
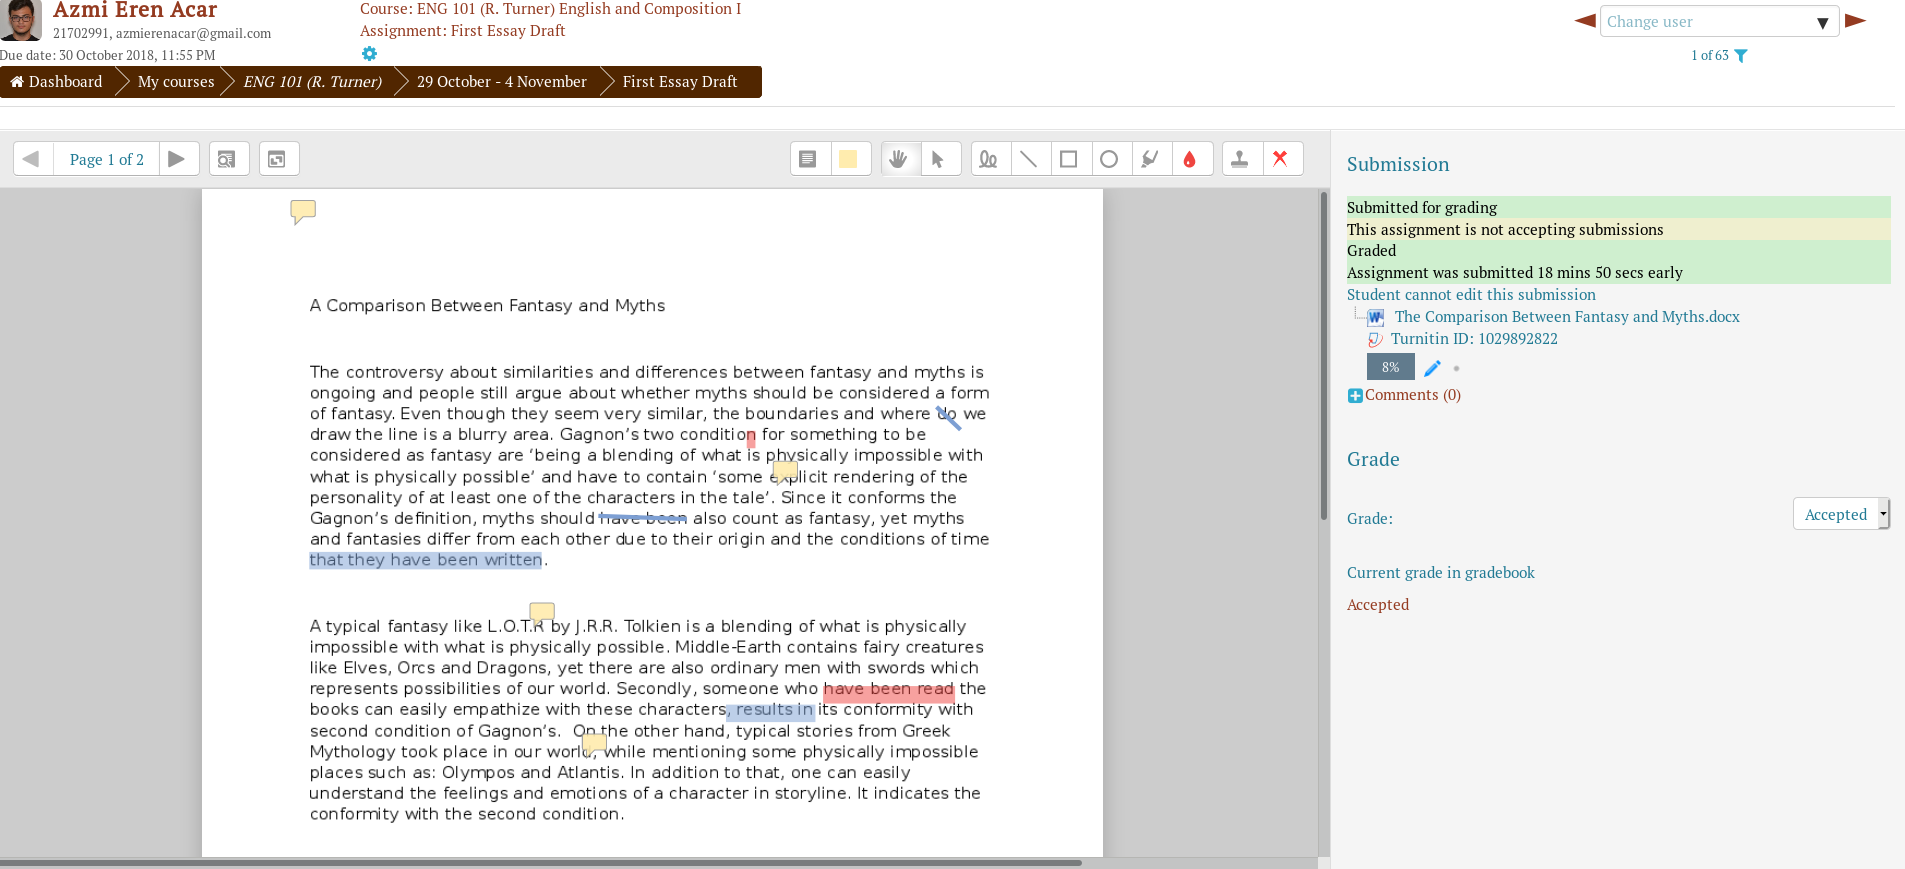
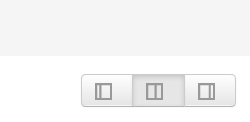
The PDF editor is on the left of the split screen. You can make it show only the editor or only the feedback comments using the buttons in the bottom right of the screen.
The editor works like most standard PDF editors. It doesn’t have as many features as, for example, Master PDF Editor or Adobe’s editor, but will do the job.

- Adding comments
Click the icon on the left of the toolbar that looks a bit like a page of text. Drag it across the text to create a box, then click on it and type inside. There is a menu button in the top right corner which is clicked will give you two options: Add to quicklist and Delete comment. The former adds whatever you just wrote to future comment menus so you can just click it instead of writing it out; the latter is obvious. You can change the background colour of the comment box by clicking the coloured square on the right of the comment icon.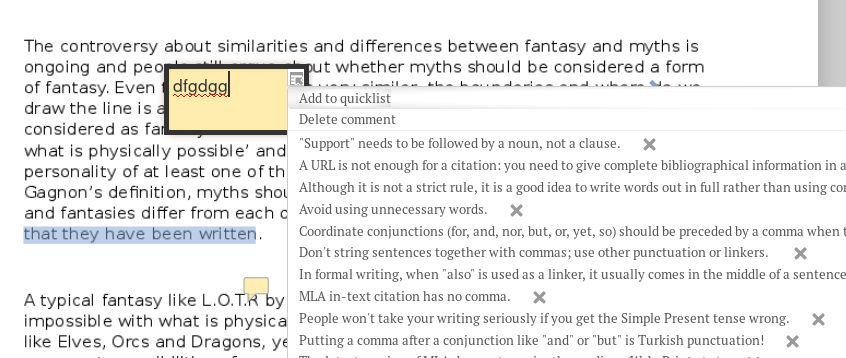
- Drawing lines and shapes.
You can draw free-form or straight lines with the mouse using the line icons on the toolbar.You can draw squares or circles by clicking on the appropriate shape in the toolbar then dragging across the text. You can select the colour using the dropper icon on the right. Note that you have to select the colour before you draw the object. - Highlighting
Possibly the most useful object is a highlight, selected with the highlighter pen icon on the tool bar. As with lines and shapes. select the colour before you use the highlighter tool. - Adding symbols
There are some symbols that can be added using the rubber stamp icon on the right of the toolbar. Select the symbol you want by clicking on the far right icon. There is a limited range at the moment, but we may be able to add different symbols later. - Moving objects
Comments and other objects can be moved around by selecting them using the arrow icon on the toolbar than dragging them around. - Deleting objects
Comments have their own delete button; other objects can be deleted by selecting them with the arrow icon then clicking the small dustbin icon that comes up. Note that the editor has no undo capability, so this is the only way to correct mistakes.
Viewing and saving Annotated Files
From View All Submissions, you can view the annotated PDFs in Moodle by clicking View annotated PDF. However, it is usually quicker to just click on the file name above that button and choose whether to view or save it.