To create a STARS-integrated Moodle course page for a Bilkent course you are teaching, please make sure you complete the following four steps:
- Create Your Moodle Courses via AIRS
- Set Up Your Moodle Course
- Add Content and Weeks/Topics
- Make Your Moodle Course Available via AIRS
1. Create Your Moodle Courses via AIRS
- Log in to AIRS and open the AIRS Moodle interface screen (see Log in to Moodle (via AIRS/BUSEL or Moodle Server/App)
- Click the “Operations” button next to the section/combined course that you want to start a Moodle course for and choose the “Create Moodle Course” option.
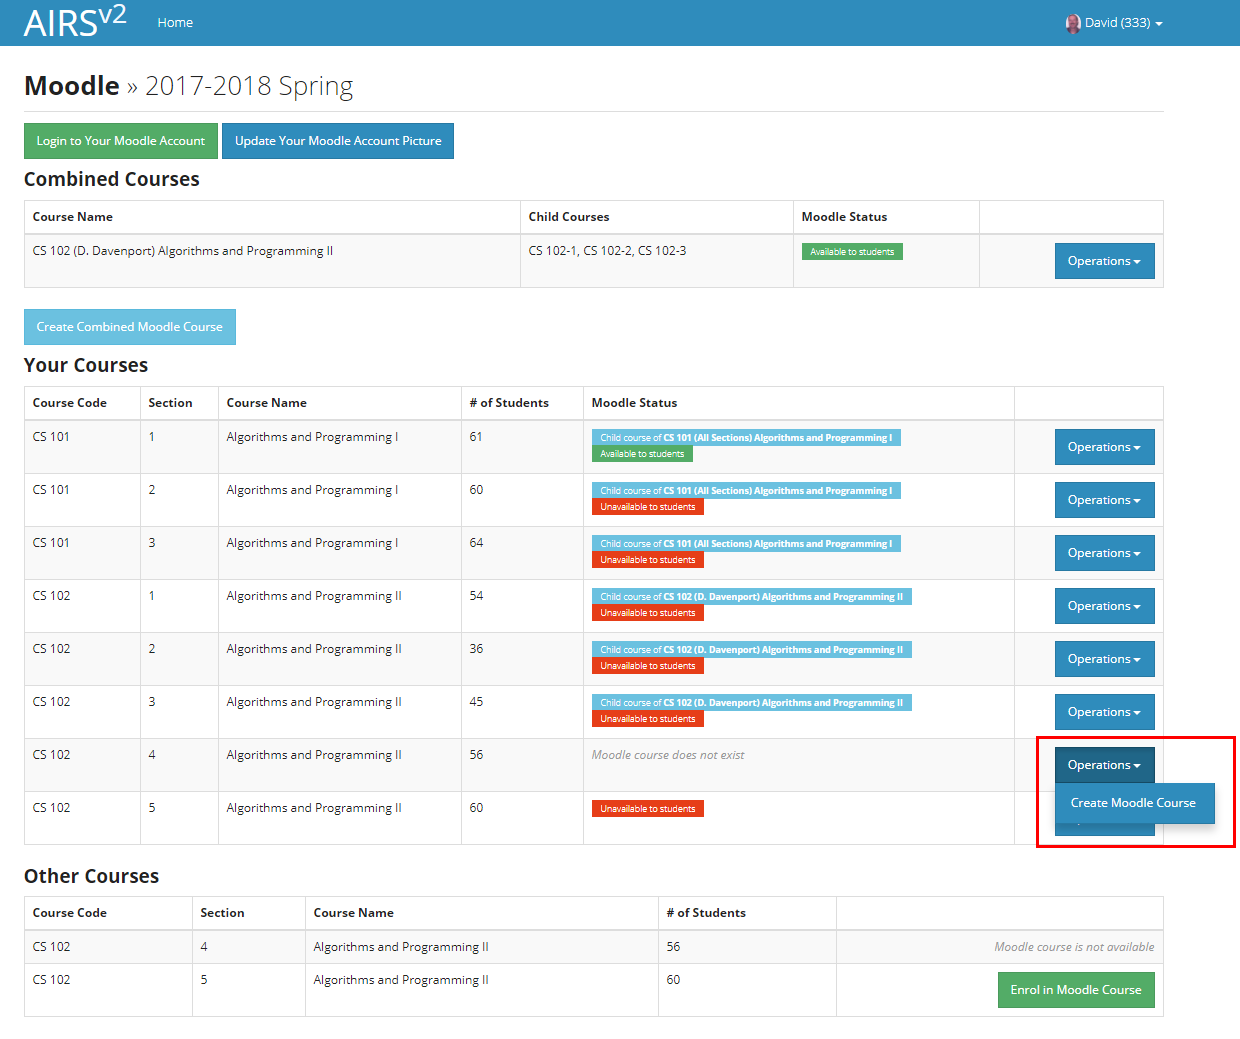
- When the course is created, it shows as “Unavailable to students”.
- Click the “Operations” button and choose the “Go to Moodle Page” option to go to the course’s Moodle page.
For more detailed information on using the AIRS instructor interface to manage your Moodle account, as well as create, access, and combine Moodle courses, see the Create Moodle Courses via AIRS tutorials.
2. Set Up Your Moodle Course
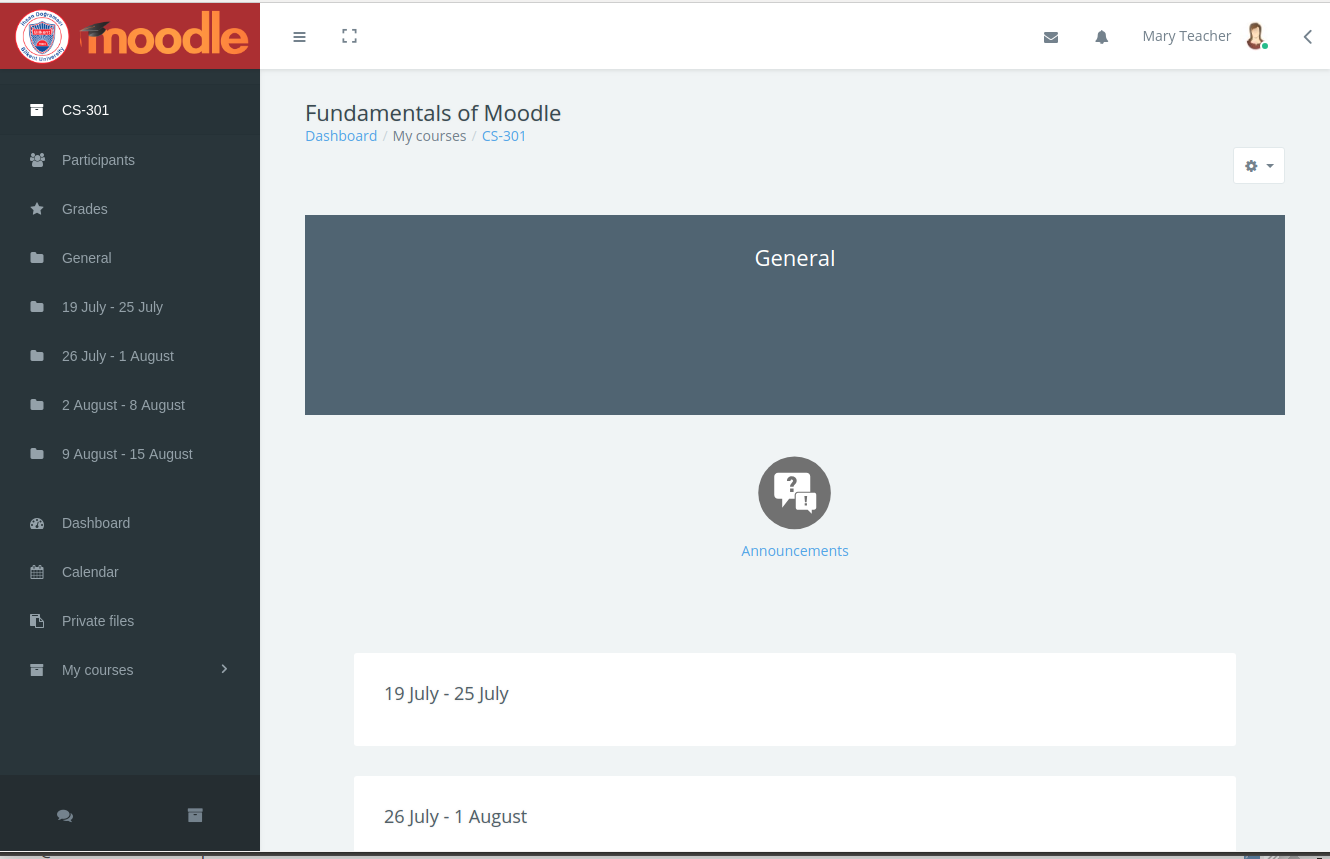
- A fresh Moodle course page will look something like this:
Edit Course Settings
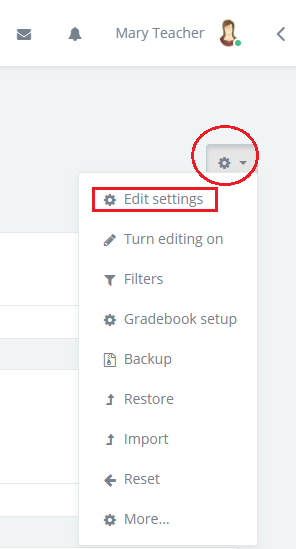
- To change the overall appearance of your course, click the gear icon at the top of the right side bar and choose “Edit Settings”.
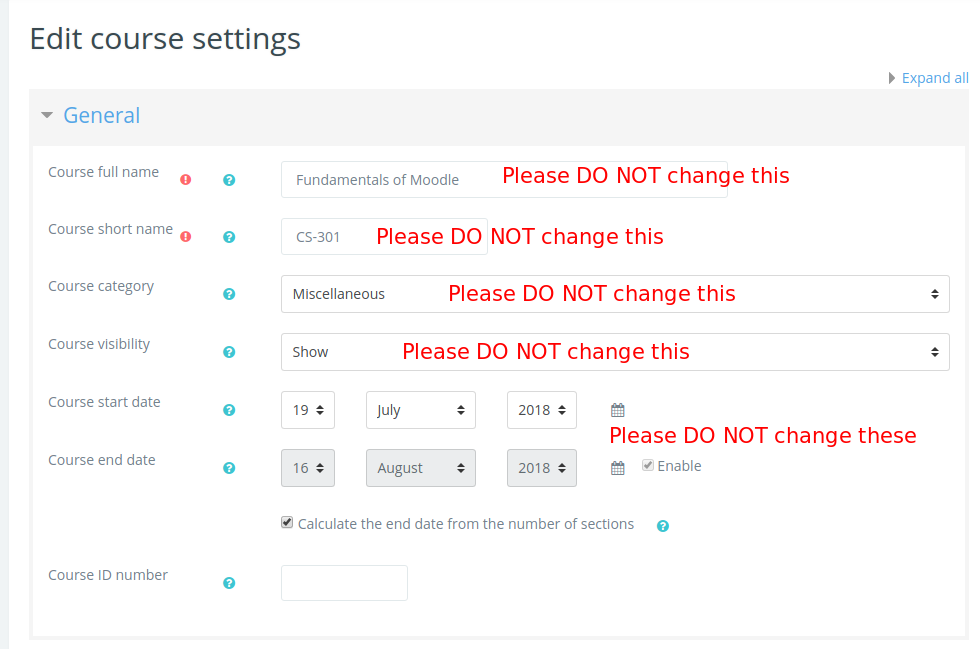
Course settings – General Section
- The course name, category, visibility, and start date settings are all set automatically by the STARS integration script, so please do not change them.
- If you like, you can set the end date for the course, or calculate it automatically from the number of course blocks.
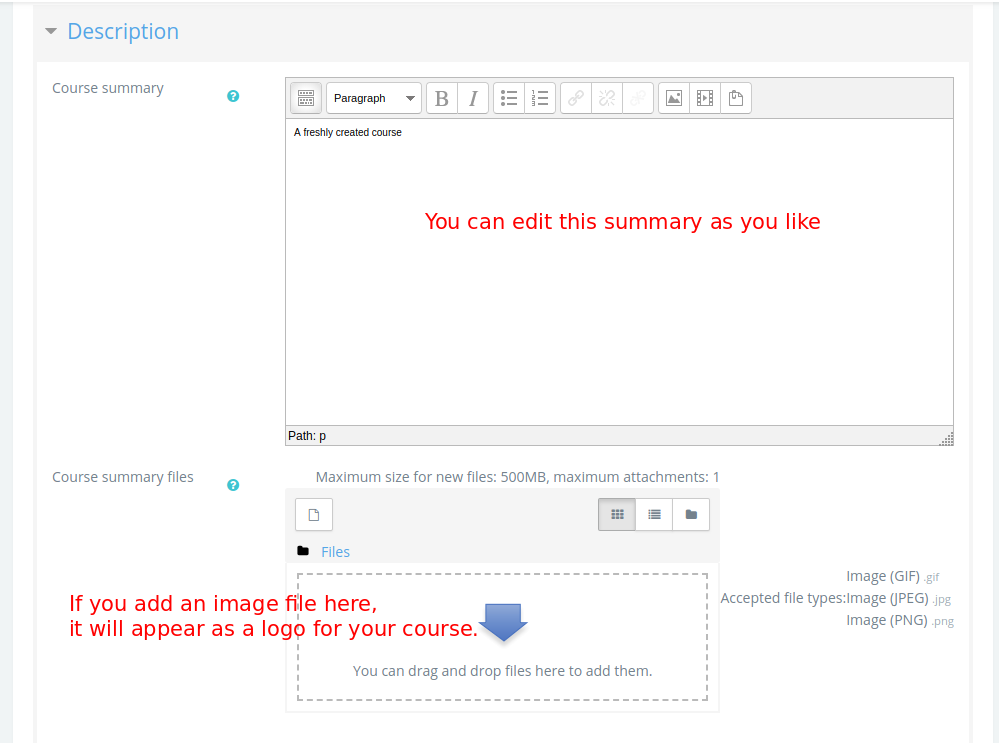
Course settings – Description Section
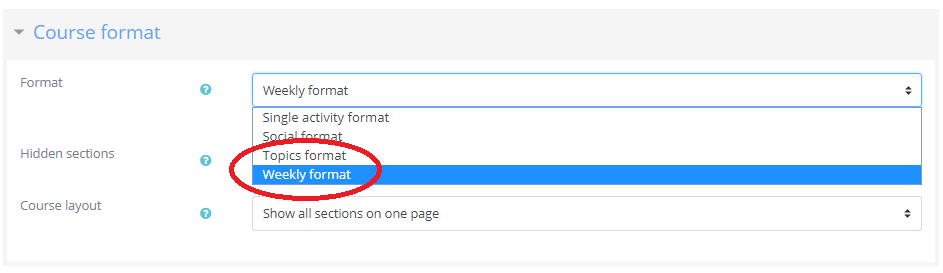
Course settings – Course Format Section
- The default setting on the Bilkent Moodle is the “Weekly Format” where each block shows the dates of a given course week. “Topics Format” organizes the Moodle main page into blocks with headings that you can specify (the default is “Topic 1”, “Topic 2”, etc.). For information about the other course formats, click here.
- The other sections of the Course Settings are self explanatory, and you will not usually need to change them.
For a full description of all the course settings, see the Moodle documentation.
3. Add Content and Weeks/Topics
- Now, if you feel ready, you can start adding activities and resources to your course page…
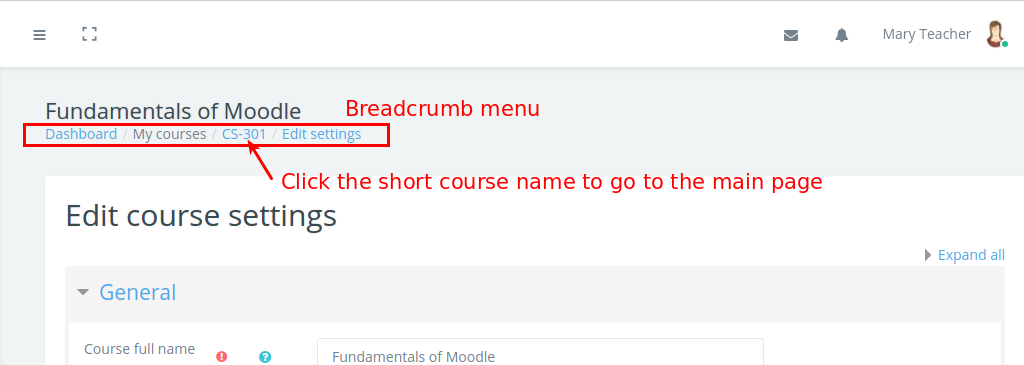
- Go back to the main page of the course by clicking the course short name in the breadcrumb menu at the top:
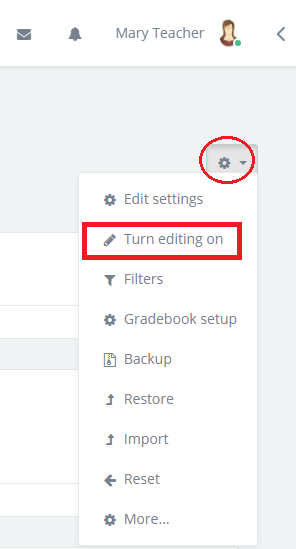
- In order to make changes to the page, click the gear icon at the top of the page and select the “Turn Editing On” option. Now you are ready to edit your course
- After you turn editing on you will see buttons to add or edit sections, activities and/or resources on your page.
- The “General Section” block could be used to place any text you want or a background image. The “Announcement” section is actually a special kind of forum and all course participants will see any announcement you put here.
- To add different Moodle activities or resources to your page, you must use the appropriate “Add an activity or resource” link. For example the button at the top of the following screenshot will add an activity or resource that will be independent of the week.
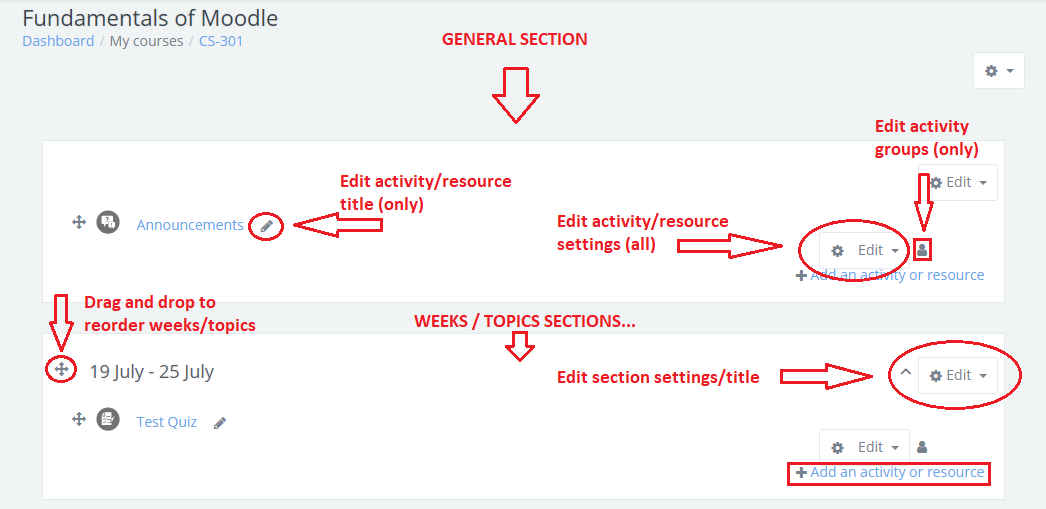
- To add a new section at the bottom of the page, scroll down and click the “+ Add Week/Topic” link
 For further details about adding different kinds of content to your Moodle course, including importing content from a previous semester or general purposes Moodle, see the Create Moodle Content tutorials.
For further details about listing/grouping students and TAs, see the Manage Students & Roles tutorials.
3. Make Your Course Available via AIRS
When your course is ready, don’t forget to make it available for students to enrol and access! (see Make a Course Available to Students).